Make a slab that is 4 mm thick (almost 1/4 inch) thick
Before you make the pieces, prepare the coloured slip transfers so they will be ready to apply when you need them
Cut out the mug wall using the paper pattern
Use a damp sponge to smooth the edge that will form the lip of the mug
Decide on the joint: an invisible mitre joint that looks seamless OR a lap joint that becomes a decorative element.
Join the wall to make cylinder
Place upside down on a yoghurt tub that has been wrapped in newspaper.
B. Make the Base
Measure the diameter of the bottom of the mug wall and cut a circle of clay that has a diameter that is about 2 cm wider
If adding a footring, add it now.
Sign the base and stamp it.
C. Make a Template for the Handle
Trace the shape of a handle on a mug you like onto a piece of paper.
Measure the height and width of the handle and multiply by 1.13 to find out the dimensions needed for greenware (based on a 13% shrinkage rate)
Redraw the handle to match the larger dimensions.
Hold the template up to the mug wall to check if it is the right size for the mug and adjust the template if required.
D. Make the Handle
Cut a band from the slab that is longer than needed to make a handle (or roll a coil)
Place the clay on the handle template
E. OPTION: Add Curves
Use the wood spoon to paddle the top and bottom of the wall inwards
Use the wood spoon to stretch out the mid-section to form a convex curve.
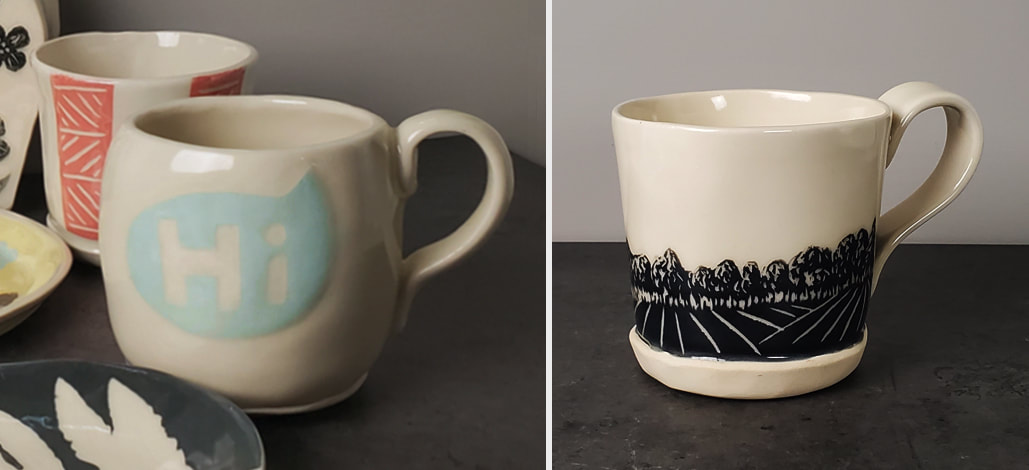
F. Add Colour
Use transfers to apply coloured slip to the mug wall
G. OPTION: Speed Up Drying
Use a hair dryer (or a fan) to speed up the drying of the mug pieces. Make sure to rotate the pieces so they are evenly dried.
STEPS TO ASSEMBLE THE PIECES
A. Attach the Base
Dampen bottom of wall with sponge
Place wall on base to mark location where to score
Score and slip base and wall
Place the base on the wall and lightly tap on the table to join
Turn mug upside-down and lightly paddle the base onto the wall edge
Lightly paddle the base to fold over the wall
B. Attach the Handle
Hold the handle up to the mug to check it is the correct shape. If adjustments are needed bend the handle in small increments using compression on both sides.
Mark where the handle will be joined to the mug and score and slip the mug and handle
Join the top of the handle to the mug
Join the bottom of the handle to the mug
Wipe away excess slip
DO NOT LIFT THE MUG BY THE HANDLE UNTIL AFTER FIRING
SGRAFFITO
If you don't want to do the sgraffito design freehand, then prepare a reverse image with a crayola marker that can be transferred onto the mug by following the instructions on the homework page.
FINISHING UP
A. Leave to Harden
Place the mug upside down on the yoghurt container and leave for 30 minutes
B. Wrap it Up
Place plastic bag on a bat
Remove mug from yoghurt container and place upside down on the plastic.. If the handle is higher than the lip of the mug, elevate the bat.
Wrap plastic over the mug
Place another plastic bag over everything and tuck under the bat
Greenware shrinks 13% after Glaze Firing If you know the final measurements you want, multiply them by 1.15 to find out the size to make the greenware. See the document below for details on how to make a template for a mug handle using the measurements of a finished mug.
Make the pieces for a mug: wall, base and handle. Then, add coloured slip for the sgrafitto decoration.
CORRECTION: the paper pattern in your kits is too large. It makes a great planter... but is not the ideal size for a mug. Download the PDF below for a pattern that is just the right size for a mug.
IMPORTANT: the calculations in the video for determining the size of the handle are inaccurate. Refer to the PDF on the left on How to Calculate Shrinkage for the correct calculation method.
Advanced options for making a base with a footring, a handle from a coil, and adding curves to the mug wall.